If you’ve ever customized a WooCommerce store, you already know the checkout page can make or break conversions. It’s where customers decide whether to complete the purchase or abandon it. One of the smartest ways to improve checkout flow is by adding conditional checkout fields.
These fields appear only when they’re relevant for instance, showing a “Company VAT” field only when a customer selects “Business,” or asking for “Delivery Instructions” only if “Home Delivery” is chosen.
In this guide, you’ll learn exactly how to set up conditional checkout fields in WooCommerce both with a plugin and custom code so your store’s checkout feels smooth, personal, and efficient.
Why Conditional Checkout Fields Matter
Every extra field on your checkout page is friction. The more a customer has to fill out, the greater the chance they’ll drop off. But removing all extra fields isn’t the answer either. Sometimes you genuinely need more information, depending on the order type or shipping method
Conditional checkout fields strike the perfect balance. They show relevant options only when needed. For example:
- Display “Company Name” and “Tax ID” only when the buyer chooses Business as the customer type.
- Show “Delivery Date” and “Delivery Instructions” only when the customer selects Home Delivery.
- Ask for “Gift Message” when the user checks Send as a Gift.
- Hide all shipping-related fields when a digital product is in the cart.
This approach keeps your checkout clean, fast, and user-friendly without sacrificing important data collection.
Understanding WooCommerce Checkout Fields

WooCommerce organizes checkout fields into arrays such as billing, shipping, and order. Each field has its own properties like type, label, placeholder, required status, and priority.
Developers can modify these using filters like:
woocommerce_checkout_fields
This filter lets you add, remove, or change any field’s behavior. It’s the same system plugins use to offer more advanced customization.
Method 1: Using a Plugin (No Coding Required)
For most store owners, the easiest and safest way to create conditional checkout fields is by using a plugin. It requires no coding knowledge and can be managed directly from the WordPress dashboard.
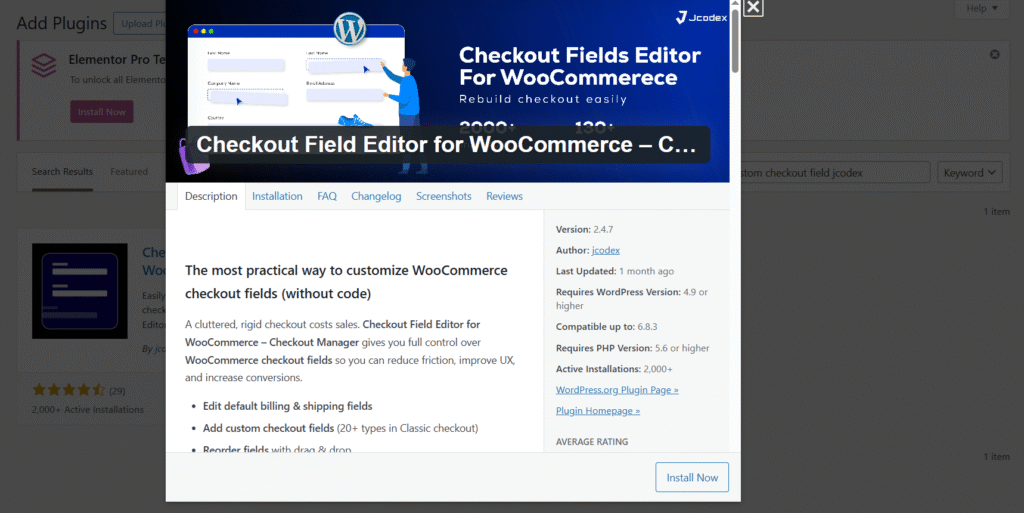
One reliable tool for this purpose is Checkout Field Editor for WooCommerce by Jcodex. It allows you to add, edit, and organize checkout fields visually and includes powerful conditional logic options.
Here’s how to set it up:
Step 1: Install and Activate the Plugin
- Log in to your WordPress Dashboard.
- Navigate to Plugins → Add New.
- Search for “Checkout Field Editor for WooCommerce by Jcodex.”
- Click Install Now, then Activate.
Once activated, you’ll find a new menu under WooCommerce → Checkout Fields.
Step 2: Add a New Field
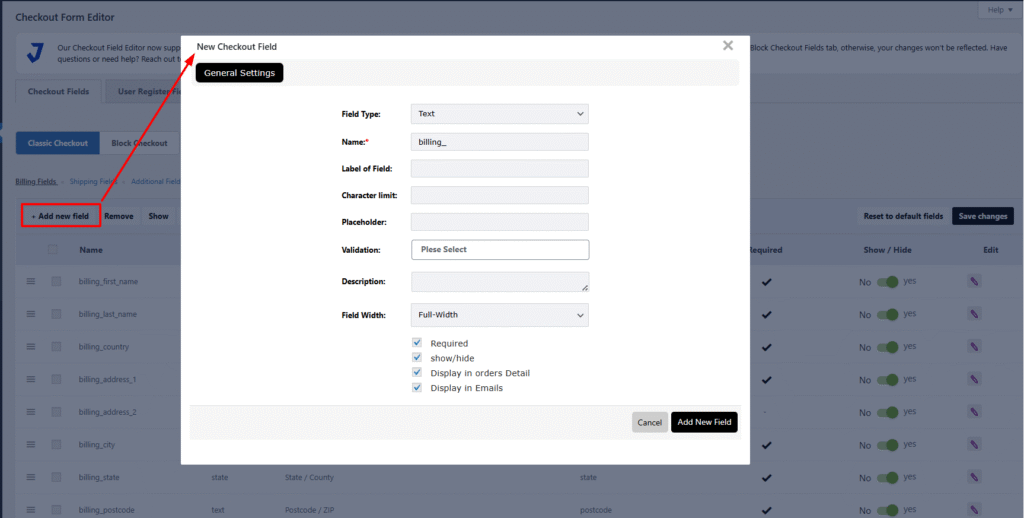
- Go to WooCommerce → Checkout Fields.
- Choose the section where you want the new field to appear Billing, Shipping, or Additional.
- Click Add Field.
- Enter the field label (for example, Delivery Date).
- Select the field type text, date picker, checkbox, dropdown, etc.
- Mark it as required or optional depending on your needs.
Click Save Changes to confirm.
Step 3: Apply Conditional Logic
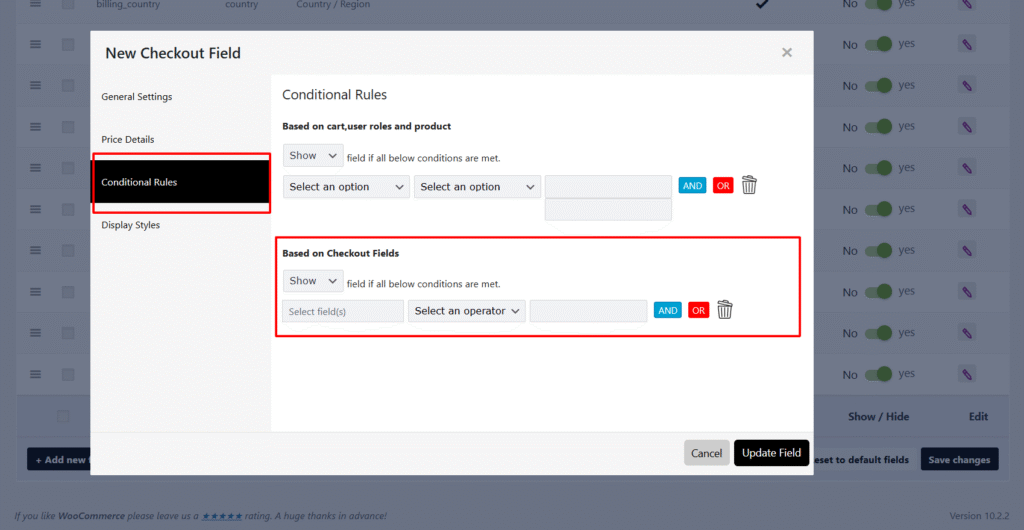
This is where the magic happens. You can control when a field appears based on what the customer selects.
For instance, if you want the Delivery Date field to appear only when a customer selects “Home Delivery”:
- Edit the “Delivery Date” field you just created.
- Scroll down to the Conditional Logic tab.
- Enable “Display this field conditionally.”
- Choose Condition Type → “Shipping Method.”
- Set the rule: Show this field when Shipping Method = Home Delivery.
You can create similar conditions based on:
- Selected Payment Method (e.g., show extra field only for “Cash on Delivery”).
- User Role (e.g., wholesale vs. retail customers).
- Cart Contents (specific products or categories).
- Custom Checkboxes (like “Send as a Gift”).
Click Save Field, and the condition will automatically apply on the checkout page.
Step 4: Example Add a “Gift Message” Field
Let’s walk through one practical example. Suppose you want customers to write a message when sending a product as a gift.
- Create a checkbox field called Send as a Gift.
- Create a text area field called Gift Message.
- In the Gift Message settings, enable Conditional Logic.
- Add the rule: Show this field when “Send as a Gift” is checked.
Now when customers tick the “Send as a Gift” box, the Gift Message field instantly appears creating a clean, intuitive experience.
Step 5: Test and Preview
After setting everything up, visit your store’s checkout page and test the conditions. Try toggling the different shipping or payment options to confirm that fields show or hide correctly.
If something doesn’t work as expected, check for:
- Theme conflicts
- JavaScript caching
- Missing field priorities or overlapping conditions
Once it works smoothly, you’ve got a professional, dynamic checkout system with no code required.
Method 2: Adding Conditional Fields with Code

For developers or technical store owners, adding conditional fields with PHP and JavaScript offers total flexibility.
Here’s a simple example. Let’s say you want an “Order Instructions” text area to appear only if the customer selects Local Pickup.
Add the following PHP code to your theme’s functions.php:
add_filter('woocommerce_checkout_fields', 'add_custom_checkout_field');
function add_custom_checkout_field($fields) {
    $fields['billing']['order_instructions'] = array(
        'type'        => 'textarea',
        'label'       => __('Order Instructions', 'woocommerce'),
        'required'    => false,
        'class'       => array('order-instructions'),
        'priority'    => 120,
    );
    return $fields;
}
This adds the new field. Now we’ll add some jQuery to toggle its visibility:
jQuery(function($){
    function toggleOrderInstructions() {
        if ($('input[name="shipping_method[0]"]:checked').val() === 'local_pickup:1') {
            $('.order-instructions').show();
        } else {
            $('.order-instructions').hide();
        }
    }
    toggleOrderInstructions();
    $(document.body).on('change', 'input[name="shipping_method[0]"]', toggleOrderInstructions);
});
This script listens for changes in the selected shipping method and hides or shows the field accordingly.
You can expand this technique to other use cases such as specific products in the cart, logged-in user roles, or even custom payment gateways.
Saving Custom Field Data
If you’re adding fields manually, make sure the data is stored properly with each order. You can do this using the woocommerce_checkout_update_order_meta hook:
add_action('woocommerce_checkout_update_order_meta', 'save_custom_checkout_field');
function save_custom_checkout_field($order_id) {
    if (!empty($_POST['order_instructions'])) {
        update_post_meta($order_id, '_order_instructions', sanitize_textarea_field($_POST['order_instructions']));
    }
}
This ensures your custom data appears in the order details inside your WordPress dashboard.
When to Use Each Method

Both methods have their place:
Use the Plugin Method when:
- You want a quick setup without coding.
- Multiple team members manage your store.
- You prefer a visual interface.
Use the Plugin Method when:
- You’re comfortable with PHP or JavaScript.
- You need advanced logic not supported by plugins.
- You want to minimize plugin dependencies for performance.
If you’re running a complex store with frequent checkout updates, the plugin method will save you hours. But if you’re building a custom checkout flow for a client or want precise control, coding it yourself gives maximum flexibility.
Best Practices for Conditional Fields
- Keep checkout simple. Only add fields that serve a clear purpose.
- Test across devices. Make sure fields display correctly on mobile, tablet, and desktop.
- Use clear labels and instructions. Avoid confusing users with vague field names.
- Backup before changes. Always back up your site before editing checkout fields or adding new code.
- Monitor performance. Too many conditions can slow down checkout; keep it optimized.
Final Thoughts
Conditional checkout fields make WooCommerce more flexible and customer-focused. By showing only the information that matters to each shopper, you streamline the process and improve conversion rates.
You can use a plugin like Checkout Field Editor for WooCommerce by Jcodex for a quick, no-code setup or dive into custom coding for more complex needs. Either way, conditional logic gives you full control over the checkout experience.
Start small, add one or two smart fields, test them with real users, and build from there. The goal isn’t just a “fancier” checkout; it’s one that feels effortless and intuitive to your customers.
When checkout feels natural, sales happen faster and happier customers come back again.
Leave a Reply